Starting your vaporizer journey can feel overwhelming. You’ve just received your medical marijuana card, perhaps after consulting with a certified physician, and now you’re standing in front of a device that looks more complicated than your smartphone. The buttons, the settings, the unfamiliar terminology. It’s natural to feel hesitant.
Many first-time users share the same concerns: What if I cough uncontrollably? What if I waste my expensive material? What if the effects are too strong? These worries are completely valid, and this guide exists to address every single one of them. By the time you finish reading, you’ll understand not just how to use your vaporizer, but how to use it confidently and safely.
Understanding Your First-Time Concerns
Before we dive into the technical aspects, let’s acknowledge the emotional side of trying a vaporizer for the first time. Research shows that many beginners worry about three main things: the physical experience (coughing, throat irritation), the learning curve (making mistakes, breaking the device), and the overall effects (feeling overwhelmed or uncomfortable).
Here’s what you need to know upfront: vaporizing is generally gentler on your respiratory system than other consumption methods. The vapor is cooler and less harsh than smoke. Modern vaporizers are designed with beginners in mind, featuring intuitive controls and built-in safety features. And most importantly, you have complete control over your experience through temperature settings and dosage.
The key is starting slowly, following proper procedures, and giving yourself permission to learn. No one becomes an expert on their first try, and that’s perfectly fine.
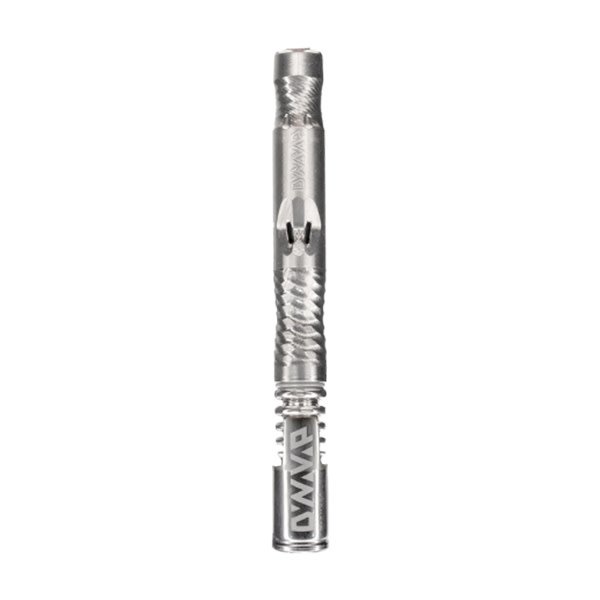
Choosing Your First Vaporizer
Understanding the different types of vaporizers helps you make sense of what you’re using and why it works the way it does.
Disposable Vapes come pre-filled and ready to use straight out of the package. They require zero setup, zero maintenance, and zero refilling. You simply inhale to activate them, use them until they’re depleted, and dispose of them responsibly. For absolute beginners, disposables remove the intimidation factor entirely. However, they offer the least control over your experience and cost more in the long run.
Refillable Pod or Tank Vapes strike a balance between convenience and customization. These devices use cartridges or tanks that you fill with e-liquids or oils. They’re reusable, offer some temperature or power control, and prove more economical over time. The tradeoff is a slight learning curve around filling, priming, and maintaining the device. For medical marijuana patients who plan to use their vaporizer regularly, this category often represents the sweet spot.
Dry Herb Vaporizers work with ground plant material rather than liquids or concentrates. They typically offer the most control over temperature and session length, but they also require the most preparation and cleaning. If your physician has recommended using whole flower for your condition, a dry herb vaporizer becomes your tool of choice.
Making Your Choice
Ask yourself these questions:
What form does your medical marijuana come in? If you’re using oils or tinctures, you need a liquid-compatible device. If you’re using flower, you need a dry herb vaporizer.
How important is portability? Disposables and pod systems slip easily into a pocket. Dry herb vaporizers tend to be bulkier.
Are you comfortable with maintenance tasks? Be honest with yourself. If cleaning and refilling feels like a chore you’ll avoid, start with disposables and upgrade later.
What’s your budget for both the initial device and ongoing materials? Calculate the true cost over three months, not just the upfront price.
Essential Preparations Before Your First Use
Your vaporizer arrives in a box, and what you do in the next thirty minutes determines whether your first experience is smooth or frustrating.
The Unboxing Process
Lay out everything on a clean surface. You should find the main device, a charging cable, potentially spare parts like extra pods or screens, and a user manual. Read that manual, even if you think you understand how vaporizers work. Each device has quirks and specific recommendations.
Check for signs of tampering or damage. Counterfeit vaporizers represent a genuine health risk, containing low-quality materials and lacking proper safety features. Verify serial numbers through the manufacturer’s website if possible. If you purchased from a licensed medical marijuana dispensary, this concern diminishes significantly, but vigilance never hurts.
Charging Matters More Than You Think
Before your first use, charge your device fully. This conditioning step helps the battery perform optimally long-term. Most vaporizers feature LED indicators that change color or pattern when fully charged. Avoid leaving the device plugged in for extended periods after reaching full charge, as this degrades battery health over time.
If your battery indicator flashes rapidly or displays unusual patterns, consult the manual before proceeding. These signals often indicate connection issues or the need for troubleshooting.
The Burn-Off Cycle
This step separates experienced users from beginners, and it’s crucial for your health. Manufacturing processes leave residual oils, dust, and other particles inside vaporizers. Running a burn-off cycle heats the device to high temperature without any material inside, vaporizing and clearing these residues.
For dry herb vaporizers, set the temperature to maximum (usually around 220°C or 430°F), turn on the device, and let it run through one or two full heating cycles. You might notice a slight smell or even visible vapor. This is normal and expected.
For liquid vaporizers with replaceable coils or pods, prime the coil by adding a drop of e-liquid directly onto the wick, then let it sit for five minutes before taking a few gentle puffs without activating the power button. This saturates the wick and prevents immediate burning.
Gathering Your Supplies
Beyond the device itself, you need:
- Your medical marijuana material (properly stored and verified from a licensed source)
- Cleaning supplies: isopropyl alcohol (70% or higher), cotton swabs, paper towels
- A grinder if using dry herbs (consistency matters significantly)
- A glass of water (seriously, keep this nearby)
- Spare parts if your device came with them (extra coils, pods, or screens)
Creating the Right Environment
Choose a quiet, well-ventilated space for your first session. You want to focus entirely on the experience without distractions. Open a window slightly to ensure fresh air circulation. Have a comfortable place to sit or recline if the effects become stronger than anticipated.
Tell someone you trust what you’re doing, especially if you’re trying this for a medical condition for the first time. This isn’t about getting “permission” but about having support available if you need it.
Step-by-Step First Use for Each Device Type
Using a Disposable Vape
Remove the device from its packaging and locate any rubber caps or stickers covering the mouthpiece or airflow holes. These protective covers must be removed before use.
Hold the vape naturally, as you would hold a pen, with the mouthpiece toward your mouth and the airflow holes unobstructed. Many first-time users accidentally cover these holes with their fingers, which prevents proper vapor production.
Place the mouthpiece between your lips and take a slow, gentle draw. Most disposables activate automatically when you inhale. You should see an LED light illuminate, confirming activation. If nothing happens, try a slightly firmer draw, but avoid pulling as hard as you would through a straw. Gentle and steady wins here.
After a few seconds, remove the device and hold the vapor in your mouth briefly before inhaling into your lungs or exhaling. This mouth-to-lung technique provides better control and reduces coughing.
Using a Refillable Pod or Tank Vape
Filling Your Device
Locate the fill port on your pod or tank. Some twist open, others slide, and some have rubber stoppers you push aside. Consult your manual for the specific mechanism.
Fill slowly using the dropper or nozzle from your oil bottle. Most pods have a maximum fill line marked clearly. Stop before reaching this line, as overfilling causes leaks. Leave a small air pocket at the top for proper pressure regulation.
Once filled, close the port securely and wipe away any excess liquid from the outside of the pod or tank.
The Critical Priming Step
This is where most first-time users make their biggest mistake. After filling, you must wait. The wick inside your coil needs time to absorb the liquid fully. Five to ten minutes of patience prevents the dreaded burnt hit that ruins your first experience and wastes your coil.
Some users speed this process by taking a few gentle puffs without pressing the power button, creating slight suction that pulls liquid into the wick. This works but isn’t necessary if you simply wait.
Powering On and Starting
Most vapes turn on by pressing the power button five times rapidly. You’ll see the LED flash or change color to confirm. Press three times to cycle through power levels if your device has multiple settings. Start at the lowest setting.
Press and hold the button while taking a slow, steady draw. Release the button before you stop inhaling. The vapor should feel warm but not hot, smooth but not harsh. If you cough, the power setting is likely too high or you’re drawing too hard.
Using a Dry Herb Vaporizer
Preparing Your Material
Grind your herb to a consistency somewhere between coarse sand and fine breadcrumbs. Too fine creates dust that can pass through screens and irritate your throat. Too coarse prevents even heating.
Loading the Chamber
Open the heating chamber and loosely fill it with your ground material. The key word is “loosely.” Packing tightly restricts airflow and reduces vapor quality. Fill about 75% of the chamber capacity for your first session. You can always add more later.
Gently tap the device to settle the material, but don’t press down or compress it further.
Setting Temperature and Preheating
Lower temperatures (160-180°C or 320-355°F) produce lighter, more flavorful vapor with a clearer-headed effect. Higher temperatures (185-210°C or 365-410°F) create thicker vapor and stronger effects but increase the risk of throat irritation.
For your first time, start at 175°C (347°F). You can always increase temperature mid-session, but you can’t undo harshness once it happens.
Turn on the device and select your temperature. Wait for the ready indicator, usually a color change or vibration, which signals that the chamber has reached the target heat. This typically takes 30 to 60 seconds.
Taking Your First Draw
Place your lips on the mouthpiece, creating a gentle seal. Inhale slowly and steadily for about 3 to 5 seconds. The draw should feel like sipping hot tea through a straw, not sucking a thick milkshake.
You might not see much vapor on your first exhale, and that’s normal. Dry herb vaporizers often require two or three draws before they produce visible vapor as the material heats evenly.
Mastering the Inhale Technique
The way you inhale determines your entire experience more than any other single factor.
Mouth-to-Lung vs. Direct-Lung
Mouth-to-lung (MTL) means drawing vapor into your mouth first, pausing briefly, then inhaling it into your lungs with a short breath of fresh air. This technique gives you a preview of the vapor temperature and density before committing to a full lung inhale. It significantly reduces coughing and provides better flavor perception.
Direct-to-lung (DTL) involves inhaling deeply and directly into your lungs, similar to taking a deep breath. This works for experienced users with e-liquid vaporizers set to high power, but it overwhelms most beginners and often triggers coughing fits.
Start with mouth-to-lung. Always. You can experiment with direct lung draws after you’ve built tolerance and understanding.
Common Inhale Mistakes
Drawing too hard creates a vacuum that can flood liquid vaporizers or pull particles through dry herb vaporizers. It also doesn’t produce more vapor. Harder pulls actually cool the heating element, reducing vapor production.
Not waiting between draws is called “chain vaping,” and it overheats coils, burns wicks, and creates harsh hits. Take a draw, exhale, wait 30 seconds, then take another. Your device and your throat will thank you.
Taking draws that are too long wastes material and irritates your throat. Three to five seconds per inhale is plenty. You’re not trying to empty the chamber in one breath.
Managing Coughs and Discomfort
If you cough, stop immediately. Take a few sips of water. Coughing usually means the vapor is too hot, you inhaled too fast, or you took too big of a hit. Lower the temperature by 5-10 degrees, take gentler draws, or both.
Slight throat tickling is normal at first. Your throat is adjusting to a new sensation. But persistent burning or painful coughing signals a problem that needs addressing before you continue.
Troubleshooting Your First Session
No Vapor Production
Verify the device is powered on. Check that the battery has sufficient charge. Confirm that the pod, coil, or herb chamber is properly seated. For dry herb vaporizers, ensure the chamber has reached target temperature, indicated by the ready signal.
Sometimes “no vapor” is actually “vapor is there but not visible.” Exhale toward a light source or into cooler air where vapor becomes more apparent.
Weak Flavor or Vapor
Increase temperature gradually in 5-degree increments. Check that airflow holes aren’t obstructed by your fingers or debris. Try slowing down your inhale speed, as sometimes faster draws paradoxically reduce vapor by cooling the heating element.
For liquid vaporizers, weak vapor often indicates a coil nearing the end of its life. If you’ve used the device for a while, try replacing the coil.
Burnt or Harsh Taste
This unpleasant experience means you’re burning material rather than vaporizing it. Immediately lower your temperature. For liquid vapes, you may have a burnt coil that needs replacing. There’s no fixing a burnt coil; you must swap it for a new one.
Chain vaping causes burnt hits even at appropriate temperatures. Wait longer between draws.
For dry herbs, ensure you’re not packing too tightly and that your material isn’t too dry. Overly dry herbs combust more easily.
Leaking Device
Check all seals and connections. Tanks and pods should click or screw into place firmly. Overfilling is a common cause; always leave a small air gap at the top.
If liquid has already leaked into the battery connection, power off the device immediately. Clean the connection with a cotton swab dampened (not soaked) with isopropyl alcohol. Let it dry completely before attempting to use the device again.
Feeling Overwhelmed
Stop using the device. Set it down in a safe place. Drink water. Move to fresh air. Sit or lie down comfortably.
The effects will diminish over time. Medical marijuana affects everyone differently, and finding your appropriate dose takes experimentation. Your next session should involve lower temperature, smaller draws, or longer waits between draws.
Cleaning and Maintenance for Longevity
After Each Session
For dry herb vaporizers, empty the chamber while it’s still slightly warm. The material comes out more easily. Brush out any remaining particles with the included brush or a cotton swab.
For liquid vaporizers, wipe the mouthpiece with a clean, dry cloth or alcohol wipe.
Weekly Deep Cleaning
Disassemble removable parts according to your manual. Soak glass and metal components (not electronic parts) in isopropyl alcohol for 15 to 30 minutes. Scrub gently with cotton swabs or pipe cleaners. Rinse thoroughly with warm water and let air dry completely before reassembling.
Never submerge electronic components or the main battery housing in liquid.
Battery Care
If your device has a removable battery, take it out for storage. Store batteries in a protective case, never loose in a pocket or bag where they can contact metal objects.
Avoid extreme temperatures. Don’t leave your vaporizer in a hot car or in direct sunlight.
Charge before the battery completely depletes when possible. Lithium batteries prefer partial discharge cycles to full depletion.
When to Replace Parts
Coils typically last one to three weeks depending on use frequency and the viscosity of your material. Signs of a dying coil include persistent weak flavor, burnt taste that doesn’t resolve with temperature adjustment, or visible blackening of the wick.
O-rings and seals should be replaced when they become brittle, torn, or lose their shape. Most manufacturers sell replacement seal kits inexpensively.
Glass components need replacement if cracked or chipped. Never use a device with damaged glass, as it can shatter during heating.
Health, Safety, and Legal Considerations
Age and Legal Requirements
Medical marijuana vaporizers are only legal for use by properly certified patients. In Florida, you must be 18 or older and possess a valid medical marijuana card issued by a qualified physician. Using a vaporizer without proper certification violates state law.
Purchase devices and materials only from licensed dispensaries. The regulated market ensures product testing, quality standards, and accountability that black market products completely lack.
Understanding the Risks
While vaporizing is generally considered less harmful than smoking, it’s not without risks. Recent research indicates that vaping may increase heart failure risk by 19% compared to non-users. Respiratory irritation can occur, particularly with extended use or at high temperatures.
Vaporizers are not recommended for individuals who are pregnant, nursing, or have pre-existing heart or lung conditions without explicit approval from their healthcare provider. If you experience persistent chest pain, severe coughing, or breathing difficulties, stop use immediately and consult your physician.
Avoiding Contaminated Products
Counterfeit hardware and black market cartridges have caused serious health issues, including lung injury and poisoning. The vitamin E acetate crisis of 2019 hospitalized thousands of users who consumed unregulated vape products.
Verify authenticity through manufacturer websites. Check for proper licensing labels on all materials. When in doubt, ask your medical marijuana physician or dispensary staff.
Best Practices for Safe Sessions
Start with the lowest effective dose and temperature. Wait at least 15 minutes between sessions to fully assess effects before using more.
Ensure good ventilation. While vapor dissipates more quickly than smoke, adequate fresh air remains important.
Never leave a charging device unattended. Use only the provided charging cable and adapter.
Store devices and materials securely, away from children and pets. Florida law requires proper storage of medical marijuana products.
Your Next Steps Forward
You’ve completed your first vaporizer session. Whether it went perfectly or had a few bumps, you’ve taken an important step in your medical treatment journey.
Keep notes about your experiences: what temperature worked best, how many draws you took, what effects you noticed, and how long they lasted. This personal data helps you and your physician optimize your treatment over time.
Join communities of medical marijuana patients where you can ask questions and learn from others’ experiences. Many dispensaries offer educational sessions or support groups.
As you gain experience, you might find that different temperatures work better at different times of day or for different symptoms. You might discover that your initial device choice doesn’t perfectly match your needs, and that’s fine. Many patients start with one type of vaporizer and upgrade or switch as they better understand their preferences.
Schedule follow-up appointments with your certifying physician to discuss your experience and adjust your treatment plan as needed. The physicians at certified medical marijuana clinics understand the learning curve and can provide personalized guidance based on your specific condition and response to treatment.
Most importantly, give yourself permission to learn gradually. Expertise develops through experience, not perfection on the first try. Each session teaches you something new about your device, your treatment, and yourself.
Your journey with medical marijuana vaporization is just beginning, and you’re now equipped with the knowledge to make it safe, effective, and beneficial for your health condition.